
Facebook is a hotbed of opportunity for dealerships looking to grow their business this year. And it makes sense.
Because with more than 2 billion active users, Facebook is a whole new world of mass-market advertising, allowing you to reach virtually every target audience all in one place.

And because Facebook ads are disruptive, you can tap into a whole new pool of customers by using the right message, offer and positioning.
But as competition begins to ramp up, so will the costs. Marketers often reminisce about the good-ol’ days of nickel-clicks in Google. Getting in on the ground floor of a new approach to marketing your dealership is the golden ticket.
Facebook ads have already been around for years, since 2007 in fact, but many dealerships still aren't taking full advantage of this opportunity. That's why it's important that you take action now.
But how do you do it?
This guide will walk you through the exact steps you need to take to launch your Facebook ad campaign.
Step 1: Make Sure You Have A Facebook Business Page Setup
Many businesses who are first getting started make the mistake of thinking a Personal Facebook Profile is the same as a Facebook Business Page.
There are lots of benefits that Facebook Business Pages provide that a Personal Profile will not:
- They’re designed to help you connect with customers.
- They give you advanced insights and metrics like who is engaging with your posts and visitor demographics.
- They allow you to give other people access to edit your page.
- And most importantly, they give you the ability to create ads!

The easiest way to tell if you are using a Personal Profile is to see if you have likes on your page or friends. If you have likes and not friends, congrats! You have a Facebook Business Page.
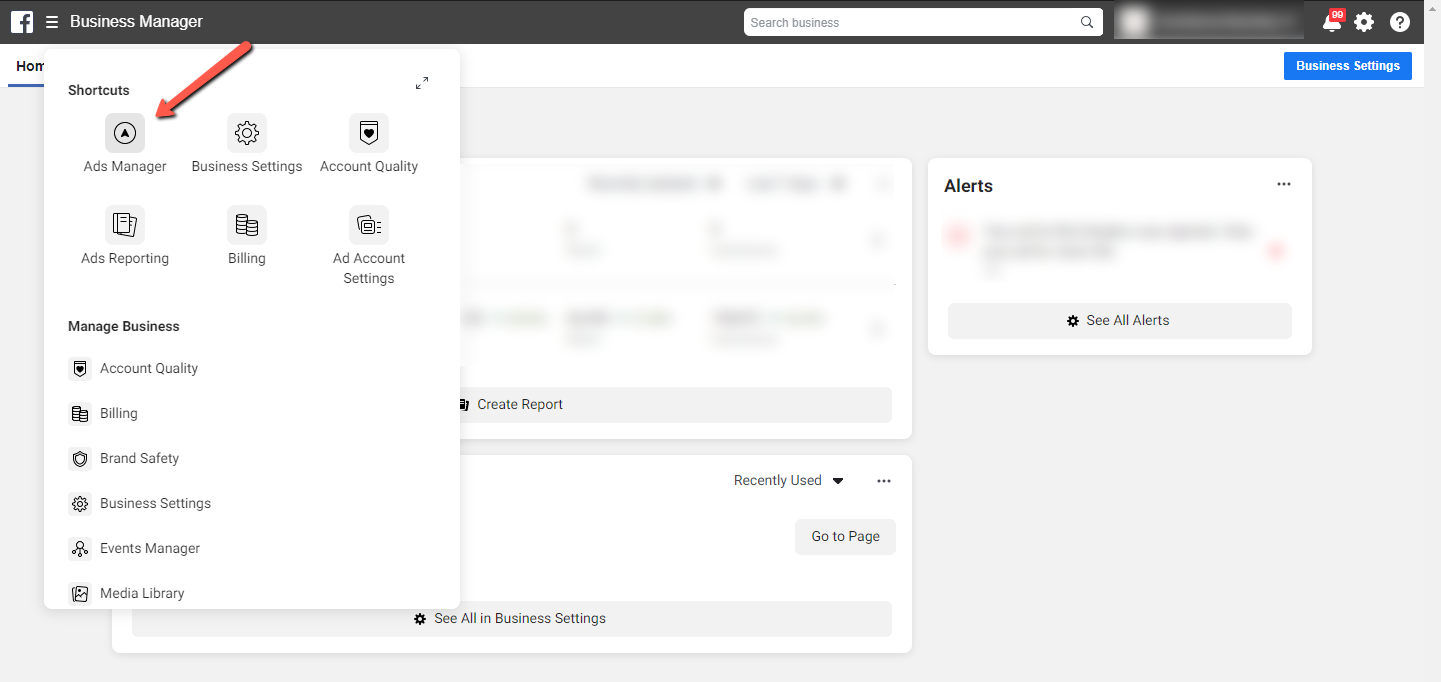
Step 2: Log In To Your Business Account And Navigate To The Ads Manager
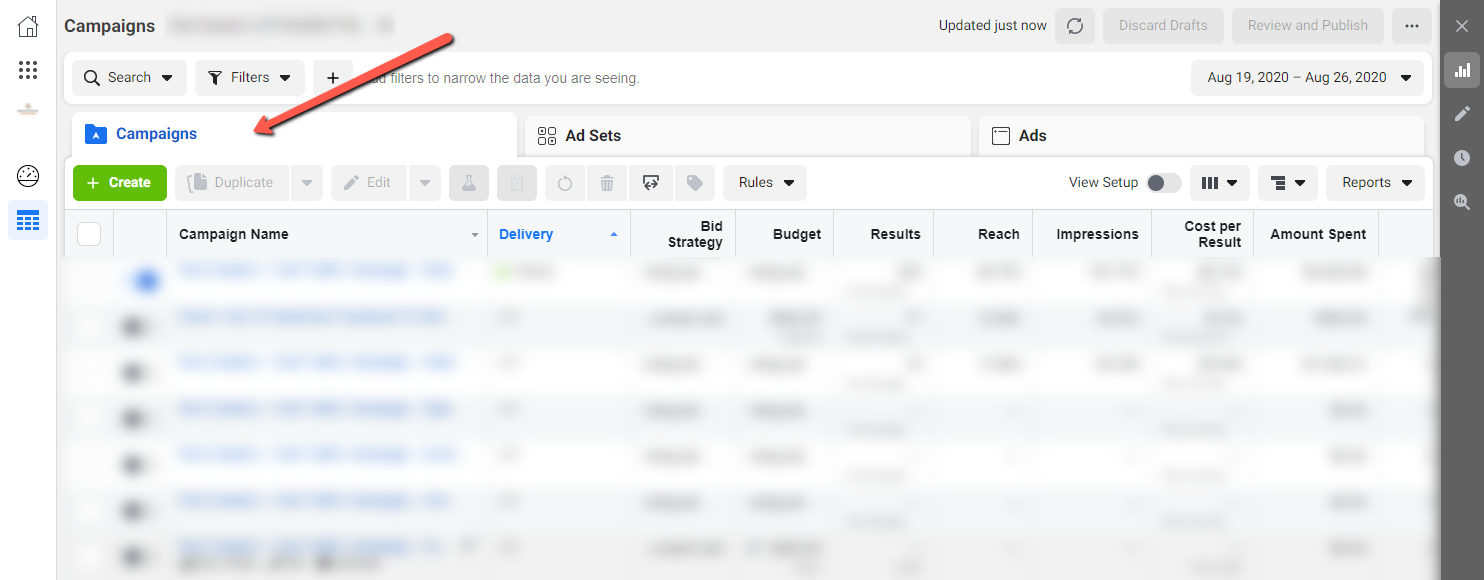
Step 3: Navigate To The Campaigns Tab
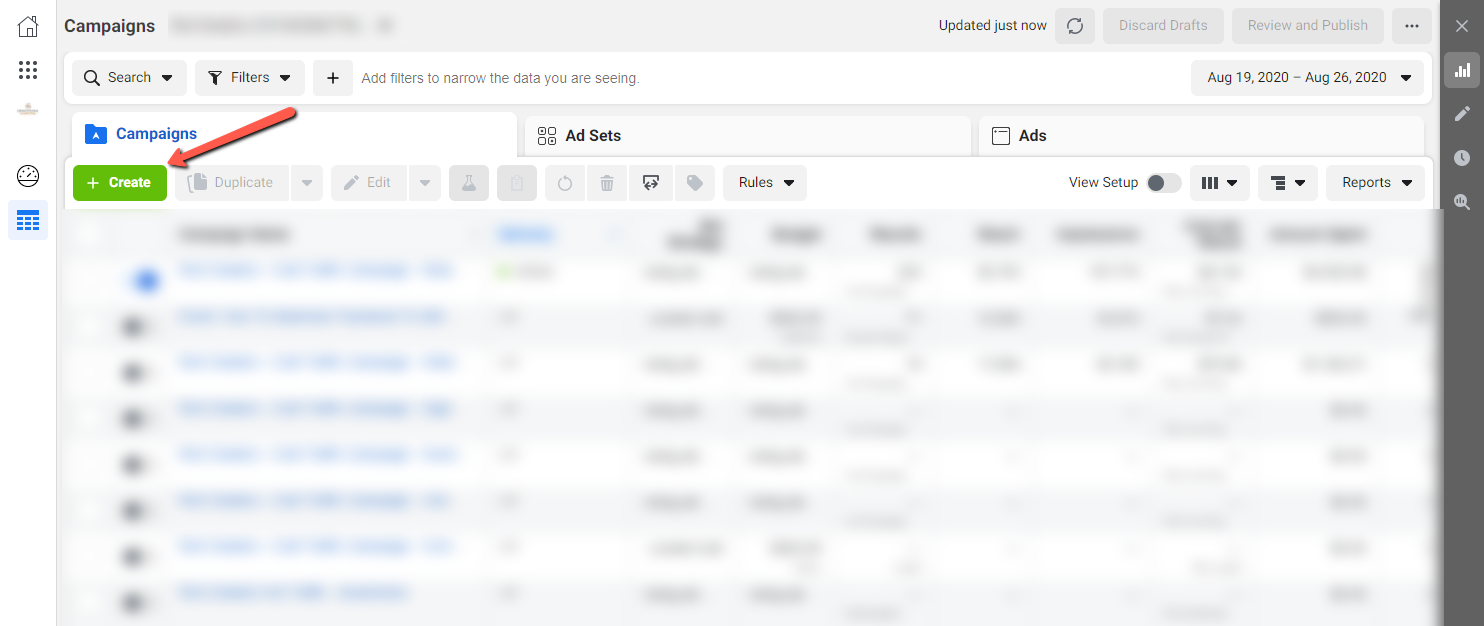
Step 4: Select Create
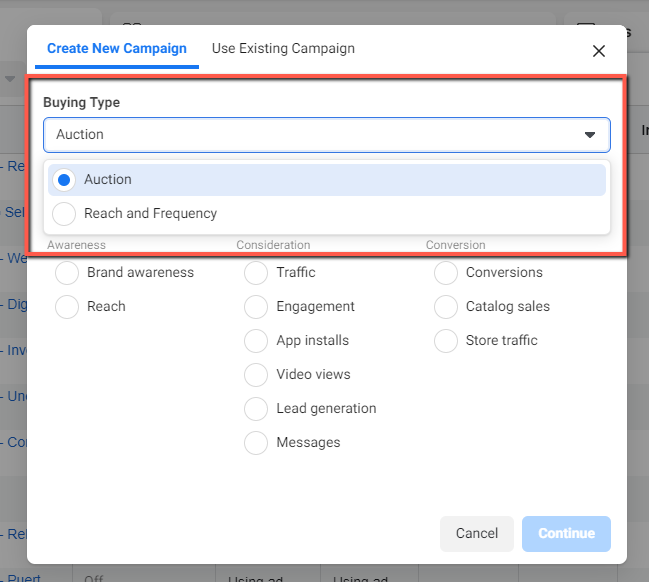
Step 5: Select Buying Type
If you’ve been using Facebook ads for a while, you have the option to duplicate a campaign or create a new campaign. If you are just getting started, you will need to start with a new campaign.
This allows you to distinguish how you want to buy your ads. The “Reach and Frequency” option allows you to plan and buy in advance to reach your audience in a more predictable way with more control over how regular your ad will be shown. Auction buying offers more choice and flexibility, but with less predictable controls over how frequently your ad will be shown.
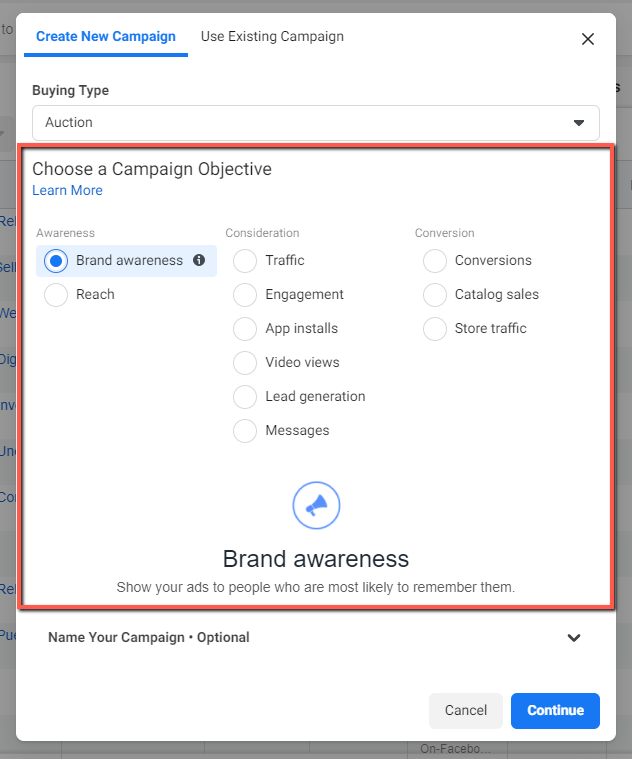
Step 6: Select Ad Objective
Facebook has over 10 ad objectives that all correspond with a business goal. For this reason, you need to begin with the end in mind. First determine what you want to accomplish. Are you looking to increase web traffic, get more leads or improve brand awareness? Once you know what you’re trying to accomplish, choose the ad objective that corresponds to this goal.
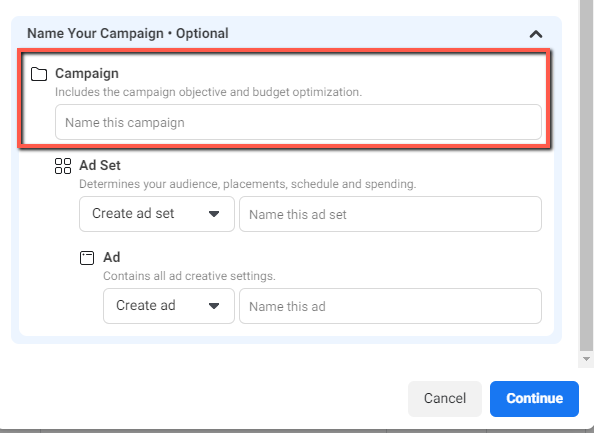
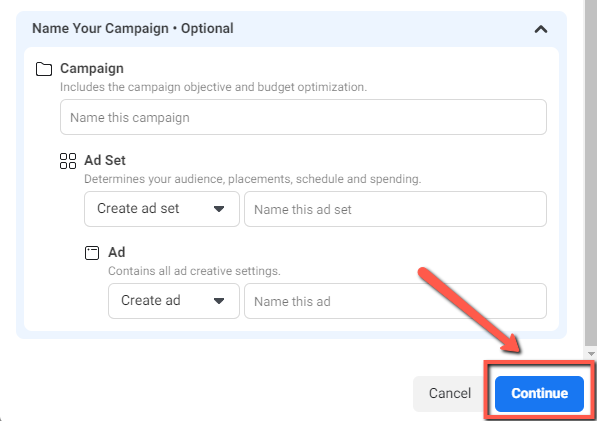
Step 7: Name Your Campaign
It's important to give your campaigns descriptive names that make it easy to identify in a list of other campaigns, especially if they have different goals. Consider implementing a clear naming convention for you campaigns, ad sets, and ads.
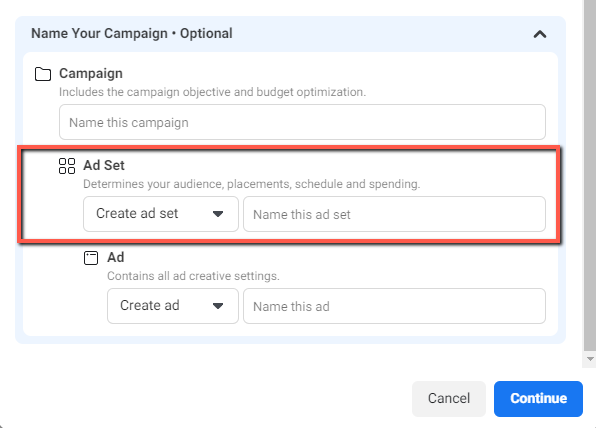
Step 8: Name Your Ad Set
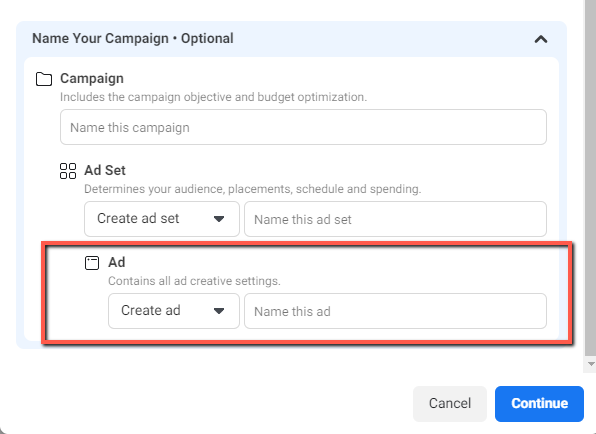
Step 9: Name Your Ad
The naming of the different components of your account is very important. It might not seem so in the beginning, but when you are managing multiple campaigns each with multiple ad sets and multiple ads, it’s essential to keep things organized.
Our experts manage hundreds of accounts, each with a multitude of campaigns and ad sets. If they didn't have a clear system of organization, it would make maintaining a high level of optimization and a low cost per lead/sale for our members impossible. Do yourself a favor and invest early in this system. It will pay off in the long run.
Step 10: Select Continue
This will take you to the campaign editor.
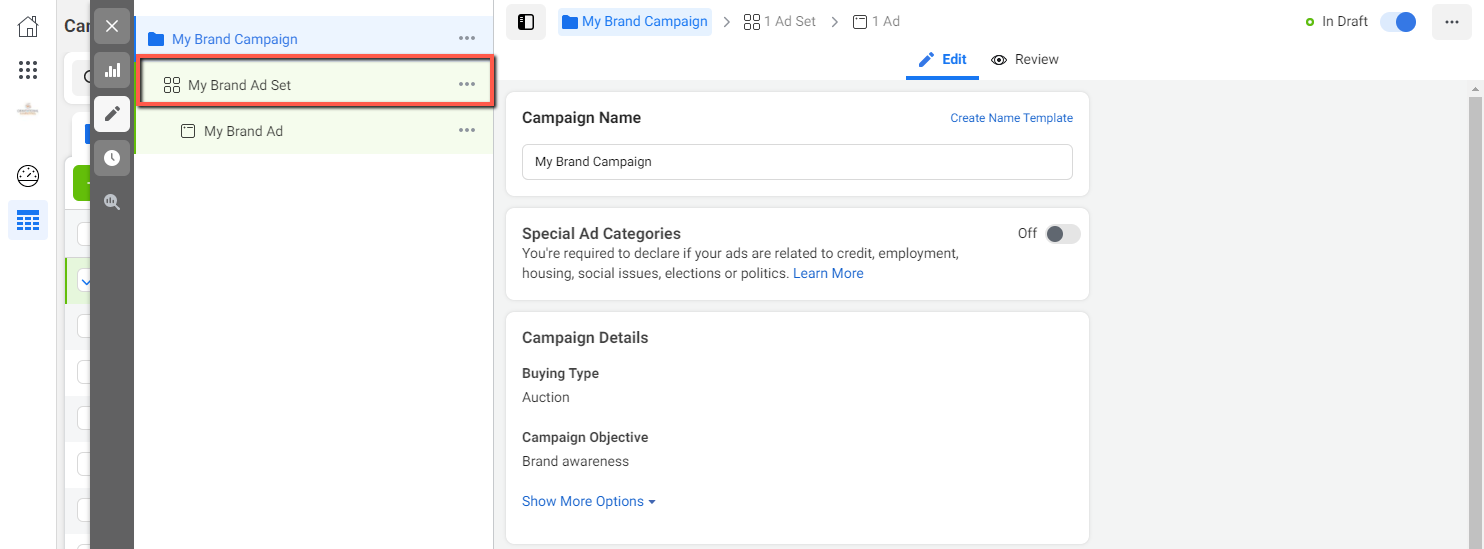
Step 11: Select The Ad Set You Want To Edit On The Left Sidebar
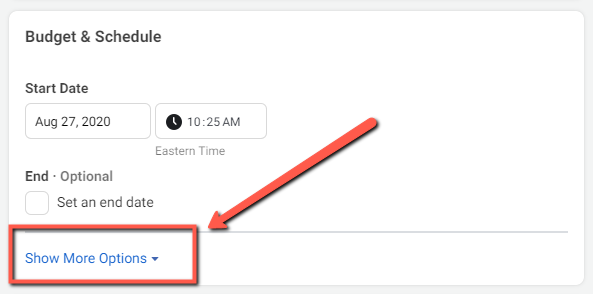
Step 12: Set Your Start & End Date
You can set both a start date/time and an end date/time at this point, if you choose. If you do not adjust the start date, the ad set will automatically start running when you click Publish.
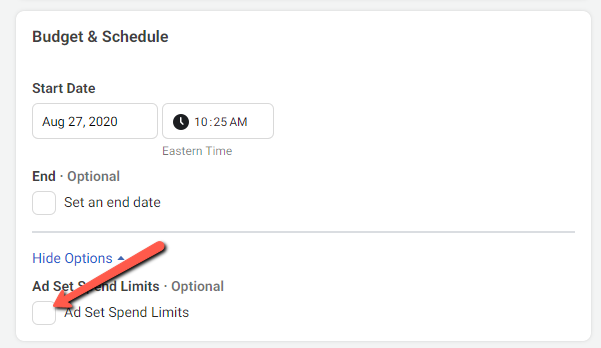
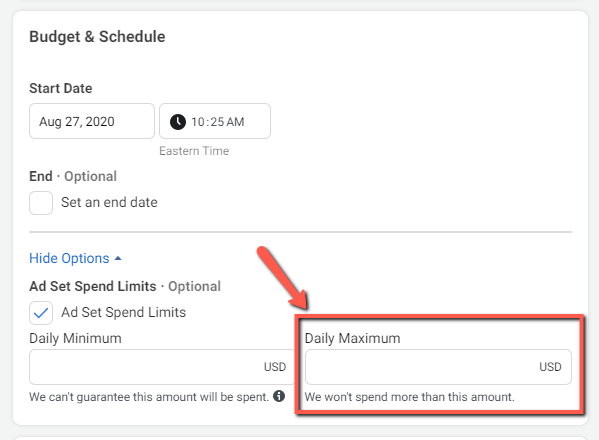
Click "Show More Options" to reveal Ad Set Spend Limits.
Step 13: Enable Ad Spend Options
If you want to set Daily Spend limits, check the "Ad Set Spend Limits" checkbox.
Step 14: Set Daily Spend
This is how much you want to spend on your campaign each day. We highly recommend setting a "Daily Maximum" in order to have more control over how Facebook spends your ad budget.
Step 15: Setup Your Audience & Targeting
You can name your audience and save it to be used for other ads, so make sure to use a descriptive name.
Then setup your location, age and gender demographics.
Facebook offers lots of targeting options, you can run both in-market and mass market campaigns. You can also retarget people who have visited your website or interacted with one of your ads.
Despite removing the ability to target in-market shoppers, Facebook still offers lots of targeting options. It's important to be clear about who your target customer is.
You can retarget people who have visited your website or interacted with one of your ads. You can upload your sold lists to target past customers with a buy-back or trade-in campaign. You can also use this list to create what Facebook calls Lookalike campaigns, where they use your uploaded list to find people who demonstrate the same behaviors as your recent customers. This is a good alternative to find in-market shoppers now that Facebook has removed that targeting option.

Step 16: Select Your Placements
Based on your goals, you can choose where your ads will be displayed to your target audience.
Facebook allows you to choose between Automatic Placements, where the algorithm will determine where to place your ads, and Manual Placements. Manual Placements give you more control over where your ad is displayed, for instance in the sidebar vs. News Feed or on Facebook vs. Instagram.

Scroll down and select the blue Next button in the bottom right of the screen.
Now it’s time to start creating your ad!
Step 17: Choose What Kind Of Ad You Want To Build
Facebook offers many different ad formats, including image, video and carousel, just to name a few.
It's important that you choose an ad format that matches your goals.
For instance, if you are running an inventory ad based on truck models, you might want to use the carousel ad, so you can display multiple images of different trucks.

Step 18: Scroll Down To Select An Image And Ad Your Copy
Make sure you choose a powerful image that will stop users mid-scroll! Your copy should include a strong headline, the benefits of working with your dealership and a call to action. Additionally, we recommend all adds include scarcity, urgency and believability if you want to dramatically increase response.

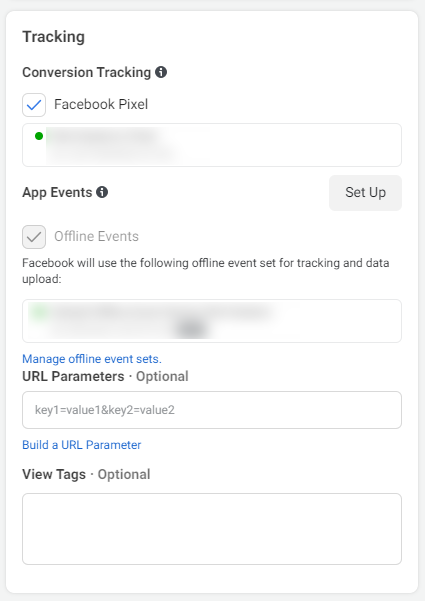
Step 19: Build A Lead Form (If Necessary) And Tracking
If you’re doing something other than Lead Generation, you’ll need to setup your tracking information, so you can accurately link conversions back to your campaigns.
Step 20: Create A Lead Form
If you decide to use the Lead Generation Ad Objective, there are some additional steps to take before you’re done setting up your campaign.
Those additional steps begin with building a lead form in order to collect the prospect’s information. To do this, scroll down select the Create Lead Form Button.

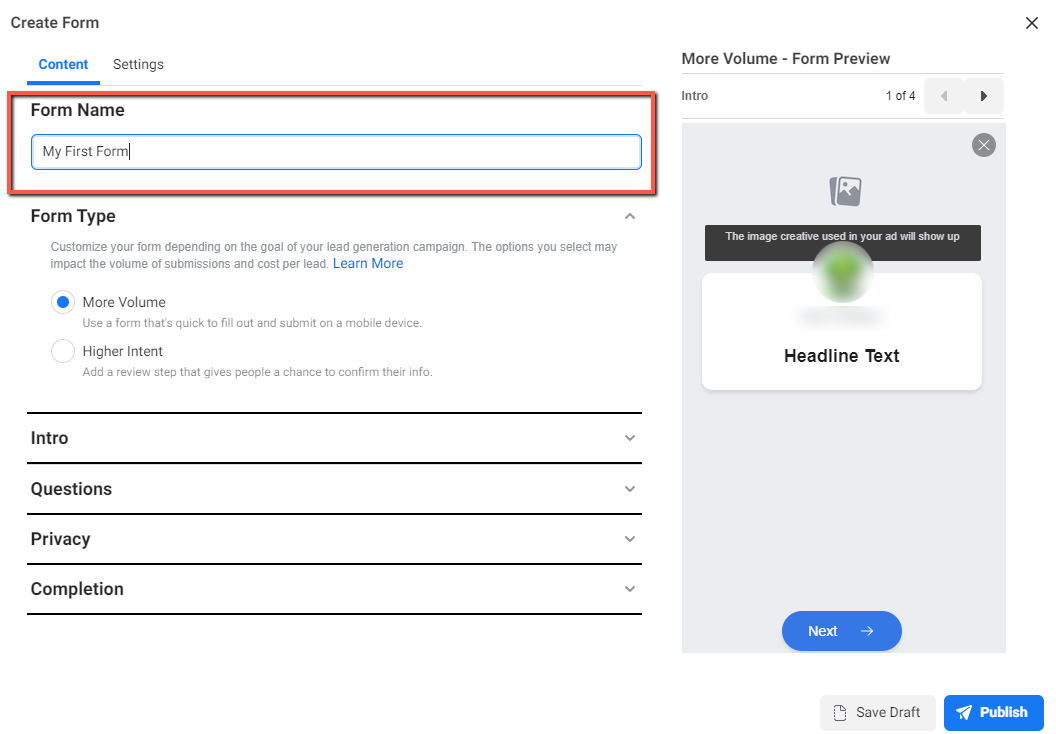
Step 21: Name Your Form And Select Form Type
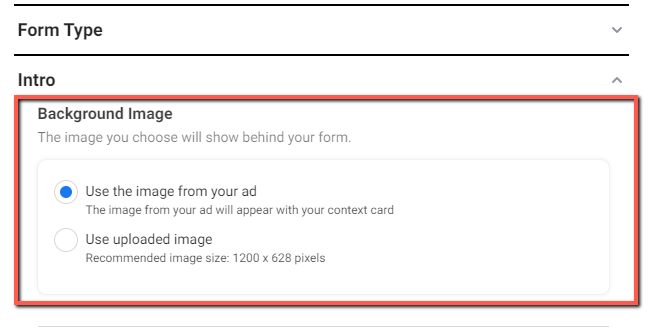
Step 22: Add A Header Image
By default, this form will use the header image from your ad. You can also choose to upload a different image for your form header instead.
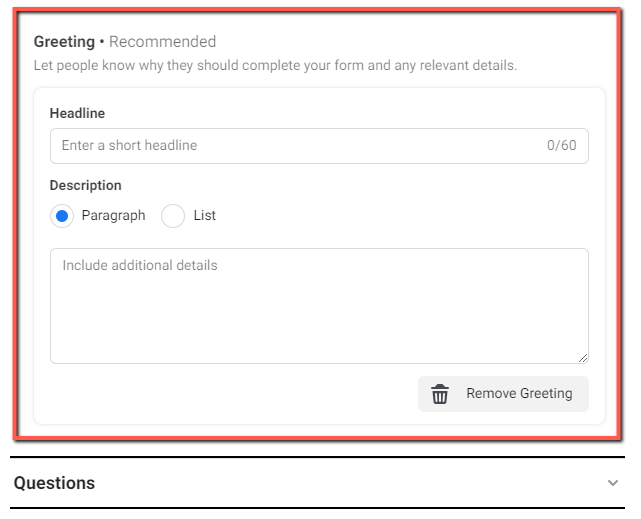
Step 23: Add Some Intro Text
It’s a good idea to use this space to reassure your audience that they’ve clicked on the right thing.
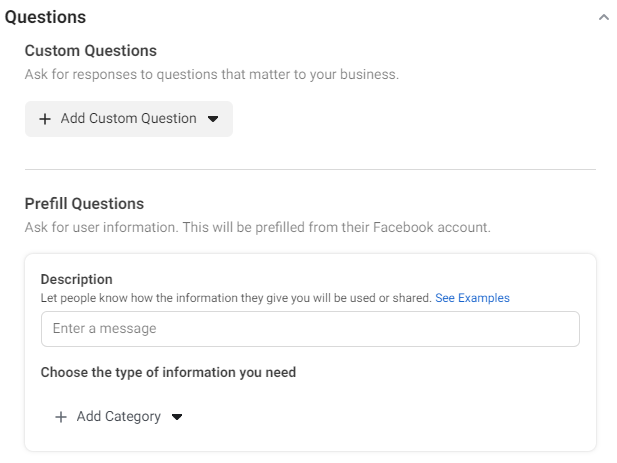
Step 24: Setup Qualifying Questions
Facebook refers to form fields as questions. You have two options for questions. Prefill Questions are questions that Facebook can pull directly from a person's profile, like name and email. Potential customers will still have the option to edit what appears in these fields before they submit the form. Prefilling this data results in fewer bogus leads and more accurate contact information.
Facebook also allows you to add Custom Questions. Custom Questions can be used to gather more information about the prospect, but keep in mind that the more fields you have, the less likely a person is to submit the form.
Before continuing on, make sure you fill in the "Description" section for this part of the form or else Facebook will not allow you to publish it. This section tells the prospect how you will use the information they share with you. It's important to be honest and reassuring in this section.
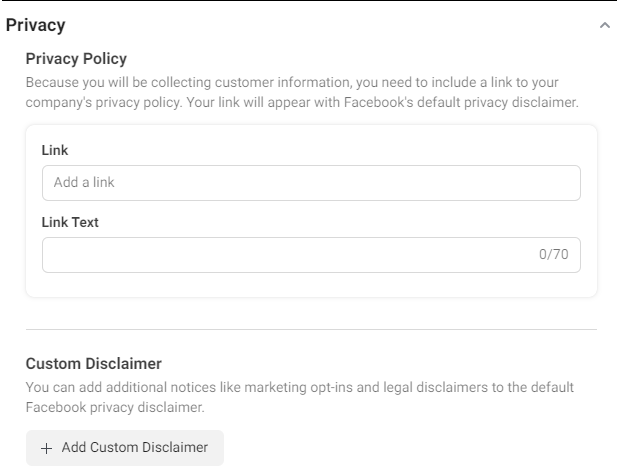
Step 25: Add Your Privacy Policy
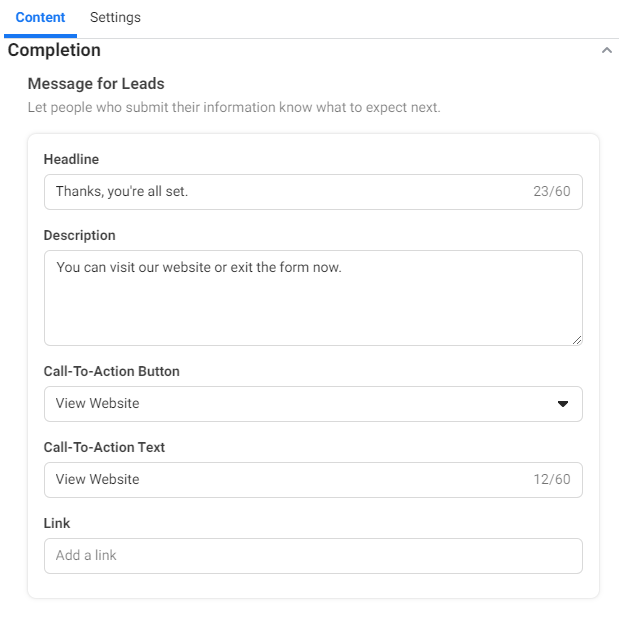
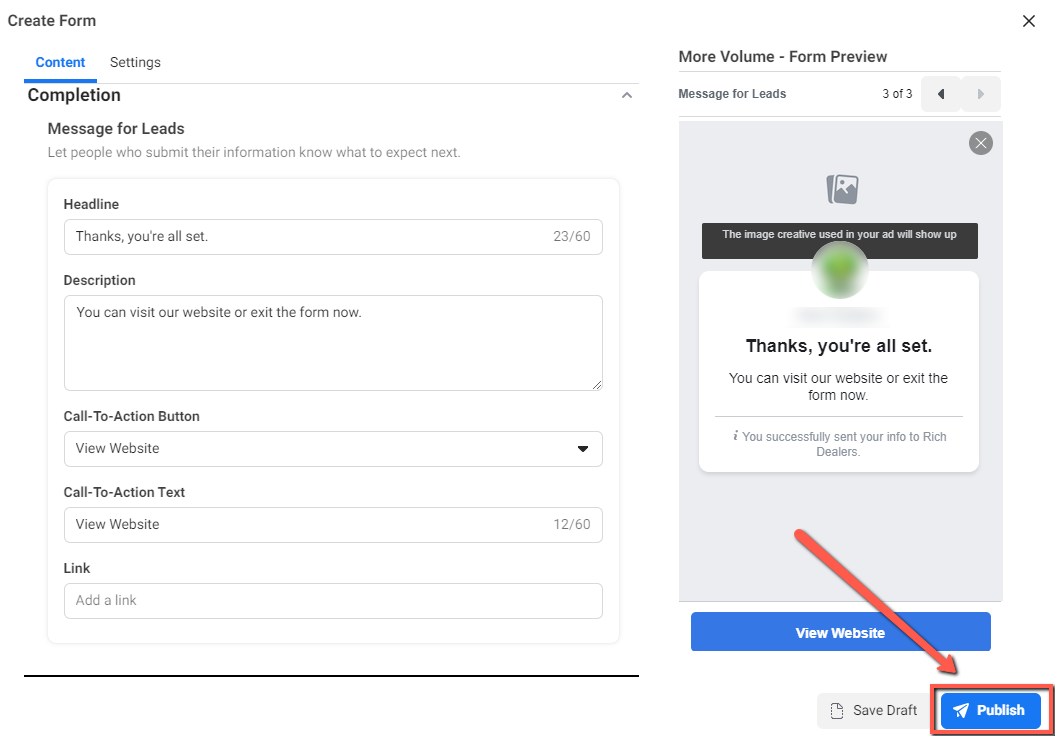
Step 26: Add A Thank You Message
This is the screen your audience will see after they’ve submitted a lead to you. It’s a good idea to set expectations here for what will happen next. You can also send them to your website from this page.
Step 27: Select “Finish”
You can’t edit a form after you select “Finish,” so make sure you double-check your work before moving on.
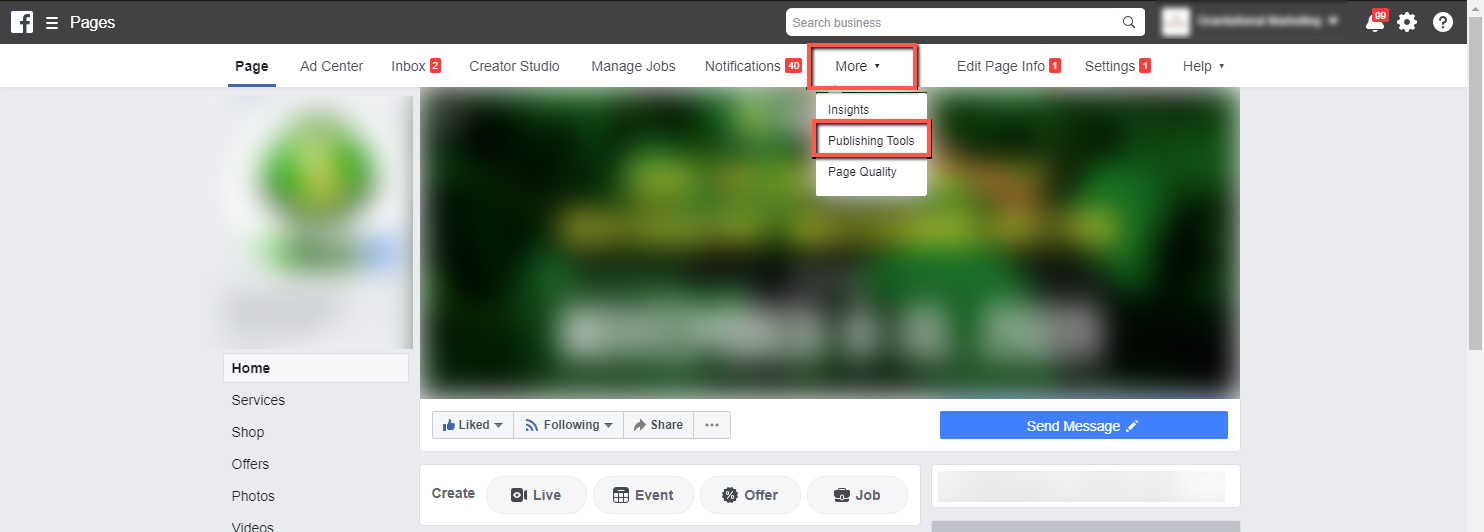
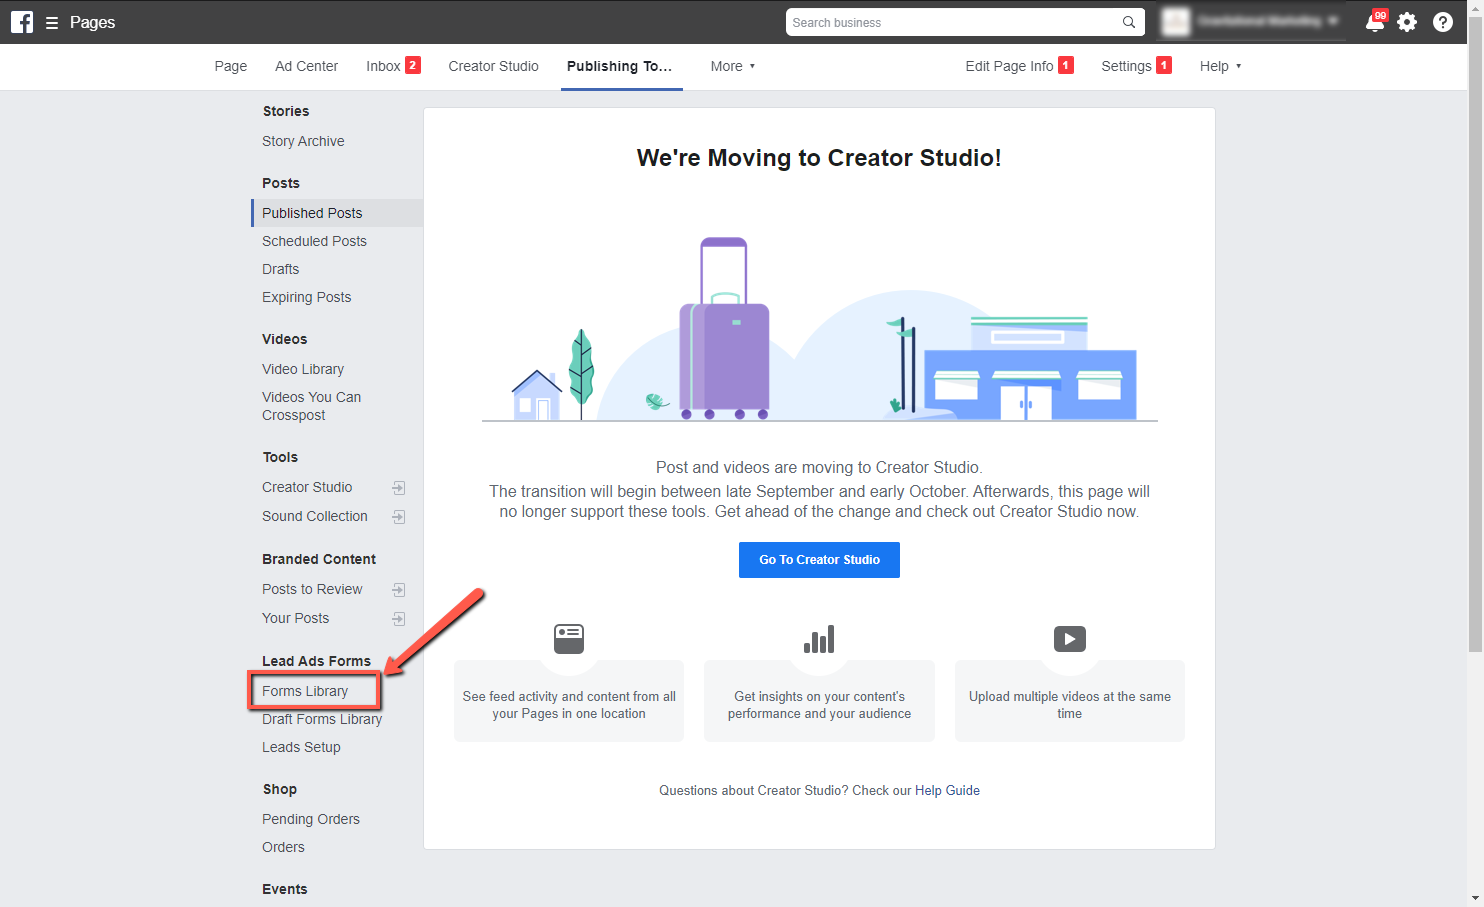
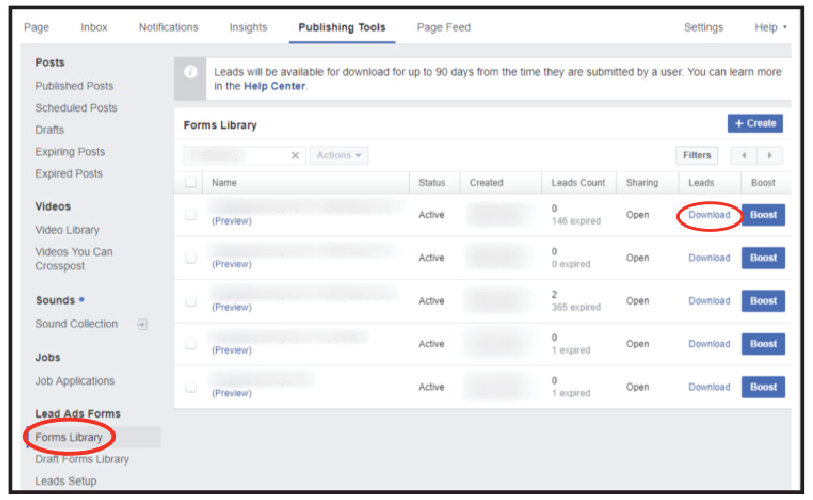
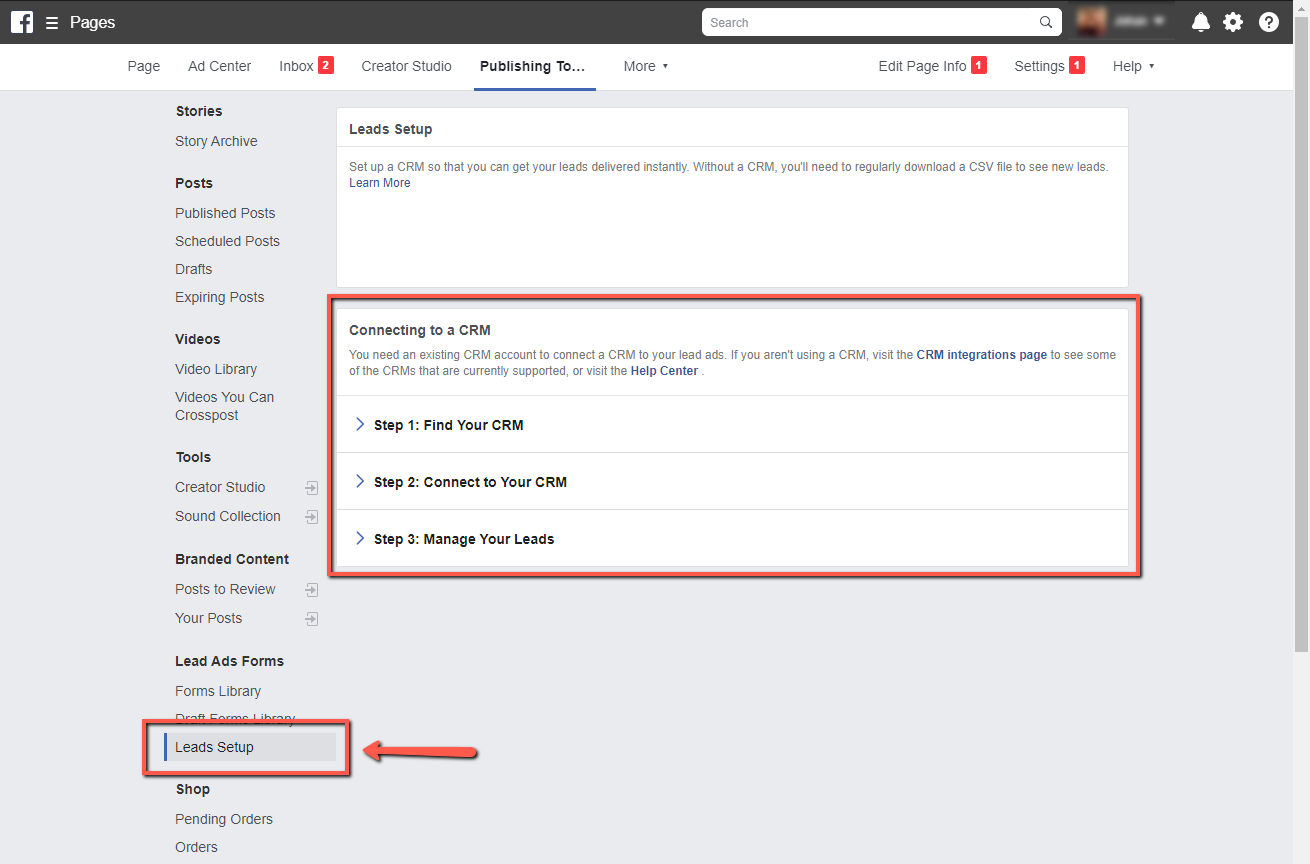
Step 28: Retrieving Leads
If you are using Lead Generation campaigns, you’ll need to retrieve your leads. To do this manually, click on Publishing Tools on your main business page. If your CRM has integration with Facebook, you can set these leads up to feed directly into your CRM.

Congratulations!
You’ve just created your first Facebook ad. Yay! But the work is not done, Facebook campaigns require regular maintenance and optimization. Our team monitors clients’ accounts daily, tracking performance and looking for opportunities to optimize accounts.
This is one of the techniques that earned us an exclusive partnership with Facebook. You see, we are so dedicated to optimizing our accounts that Facebook found that we were calibrated to get our clients the most bang for their buck 98% of the time. Just as a side note, Facebook only requires accounts be optimized at 47% in order to be considered for partnership.
If you’d like to learn more about the strategy we use to help dealers get more traffic, leads and sales in Facebook and in all of their marketing efforts, click here to setup a free demo.